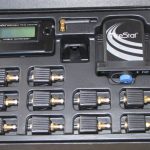
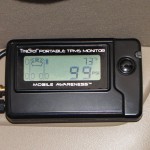
When it comes to RV and Trailer safety, very few things list higher in my mind than the tires under them. Recently, I’ve had the opportunity to use and review Mobile Awareness, LLC’s TireStat™ tire pressure monitoring system. The TireStat package is a commercial grade external-installation tire pressure and temperature monitoring system designed for the commercial truck market, and is now being targeted toward the recreational vehicle market.
Tire pressure monitoring systems, or TPMS, are just what they sound like. They monitor the tire pressure on all your tires remotely, so you can be notified of pending issues, like blow-outs or flat tires before they happen. Many SUVs and pickups now come with simple TPMS systems installed inside the tire, attached to the rim. The simple systems will light a warning light on your dash, and it’s up to you to figure out which tire is the problem, and these systems do not include your trailer tires in their monitoring. The more advance systems, like TireStat, mount on the valve stem, and send exact data back to a control unit. These control units will show you each tire’s air pressure, and in some cases, the temperature of the tire as well. The controllers also have alarms that you can configure to your needs based on your vehicles.
Two problems usually plague these systems however. First, most systems rely on a low power transmitter in the valve stem cover, and a small antenna on the receiver… which can be quite a distance between the rear most axle of a 5th wheel, and the cab of your truck. This combination has given TPMS a reputation of being unreliable. The second problem is the actual sensor/valve stem cover itself. In order to fill the tire, or manually check the tire pressure on most systems, you are required to remove the sensor. Having it removable can also lead to theft, or loss.
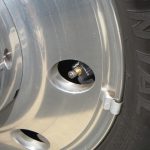
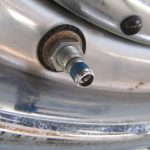
The TireStat product takes on both of these problems with a vengeance. The TireStat includes a booster transmitter (for units with more than 4 sensors) that hardwires into the 12v system of either your tow vehicle, RV or trailer. With the booster powered on, the effective distance increases to well over 100 feet. TireStat also solves the sensor removal problem, by allowing you to air the tire with the sensor attached to the valve stem. The TireStat locks onto the valve stem with set screws, and is installed with tread lock to further prevent theft or loss. How ’bout them apples?
The actual install of the TireStat is relatively simple; 1) install the booster, 2) install the sensors, 3) power on the monitor and set your defaults… Here’s my install:
Ordering and prep:
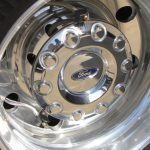
The TireStat requires metal valve stems due to the slightly increased mass the senors adds. I had one rubber stem on my toy hauler, don’t ask why. So I replaced that valve stem with a metal stem. Also, measure the thread length on your stems, the set screw lock mechanism requires at least 17mm of thread, which I did not have. So I ordered the TireStat with with the 10mm modification, which eliminated the set screws. Not a big problem, as the thread lock you install the sensors with does a reasonable job of making the sensors a pain to remove. I have a dually and a double axle toyhauler, so I ordered the TireStat 10 (10 sensors) to fit my configuration. They have options up to 12 tires in the recreational vehicle section, and up to 18 tires in the commercial section, and multiple configurations for each layout.
Installing the booster transmitter:
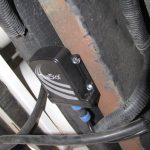
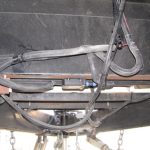
The booster transmitter (or Universal Transceiver) should be installed at either the rear of the first vehicle, or front of the trailer in a spot that has little interference. I opted to install under the trailer, just aft of the tongue. Mobile Awareness recommends a switched 12v source, but as my trailer is either plugged in, or the batteries disconnected, I wasn’t worried to much about the <20mA draw. I wired into the junction box at the front of my toy hauler, and temporarily zip tied the booster in place.
Installing the sensors:
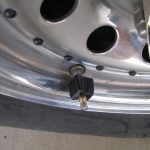
Each sensor is numbered, and a diagram sent with the TireStat shows where to install them. I started on the truck, and took this opportunity to also install dually extenders. Then moved to the trailer. A simple dab of thread lock (supplied), and a few twists and each was installed.
Setting up the monitor:
I had let the monitor charge in the truck while I was installing the booster and sensors. It’s a portable monitor, and includes a standard 12v plug, and a hardwire kit as well. I said before, I installed the booster temporarily with zip ties, and here’s why; I wanted to make sure I choose a location that would provide good coverage. I went to the truck and powered on the monitor, and let it gather it’s connections. I actually took it into the house while I waiting not really thinking about leaving it outside nearer the truck and trailer, and got a glass of water… about 2 minutes later, I picked up the monitor, and it had gathered all the sensors from inside my house! Ok, I guess the booster was in a good place. So I crawled back under the trailer and permanently mounted it. Then I followed the instructions on setting my low pressure, high pressure, and temp warnings for each axle. Now came the hard part… where should I mount it in my cab?!
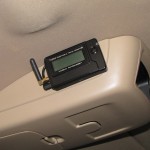
The monitor unit comes with a plastic mounting base, that can attach with double sided tape, or the included double stick Velcro. I placed it in several positions on my dash with some wall tack I had laying around, but couldn’t find a place I really liked it. Being what it is… I don’t plan on constantly looking at it for stats, so I really didn’t want it in my line of sight on the dash. Also, here comes my only gripe about the unit… the power LED is VERY bright at night. I decided finally on my mounting position, mounted on the overhead console in my cab. I mounted it with the double stick Velcro, and hard wired (also included) to my dome light power. In this position, I can easily hear alarms, and check status when I need to, and the LED and unit is out of my line of sight. Perfect!
Road review:
Before I left, I checked the tires with a digital gauge. All the pressures were within 1 psi of the readings on the monitor. With my toyhauler hooked up, I left on a quick 20 mile loop to evaluate the unit. Less than 1 mile down the road, I realized with the help of the monitor’s alarms, that I had a leak in an inner dually. Turns out, the valve extender was not tight, and the initial rotational force once moving must have triggered the leak. A dab of thread lock and with the help of a large 12v compressor, and I was on the road again in about 5 minutes. No other issues during my test loop. The monitor never once lost contact with the sensors, and I was able to check the readings several times while at stop lights.
I pulled back into my pad then checked all the pressures again with the digital gauge and found all the pressures were exactly matched with the TireStat Monitor. Impressive! Next I broke out an infrared temperature meter to check the tire temps. I figured these would be off, sense I would be reading the rubber temp, and the TireStat reads the air temp. Each tire was off about 10 degrees from the rubber temp, which in my opinion is reasonable with the type of reading. I’ll just have to re-adjust my thought process for the new readings. No problem!
This is an outstanding TPMS. It does not suffer from the signal loss that many other units suffer from, and I really liked being able to check and fill my low tire with out removing the sensor from the wheel. Bravo Mobile Awareness for making a logical product that actually works as advertised. You can visit Mobile Awareness on their website www.MobileAwareness.com or give them a call at 866-653-5036. Tell them Toy Hauler Adventures sent you!

